Thursday, May 14, 2009

Barefoot Plumies is now CAB Cooks!!

It's final. The small blog of Barefoot Plumies will be no more after today. But with encouragement from readers and the Mister, I have decided to start a new blog elsewhere. I'm hoping to make it better than Barefoot Plumies with more recipes, more pictures, and more kitchen gadget reviews.

My sincere thanks to everyone who has stopped by, to those who have shared thoughts to help improve the blog, and most of all, to the Mister and Guinea Pig Panel for being the first to try my concoctions and supporting my half-baked ideas (sorry for the bad pun)! Hang on to your slippas cuz there will be more for the new site.

What's the new site, you ask? It is....(wait for it...) CAB Cooks ! Okay, maybe not original but at least it's to the point. I will be migrating most of the recipes from this blog over to the new one so they are all in one convenient place. Hope to see you over there!


Read more!

Tuesday, May 12, 2009

Google Screw-up

I'm posting this since mainly to notify readers who have RSS feeds or Google Readers to my site to let you know of the problem I am having with my blog at the moment.

Some of you have been wondering what in the world is going on with this blog. Well, I'm trying to re-establish BarefootPlumies.com but Google Apps dropped the ball and Blogger is completely useless at this point. Fo the time being, I am reactivating the old URL: barefootplumies.blogspot.com until the issue is resolved one way or another by the end of the week.

At this point, I'm debating to even stay with Blogger or go with another blog service provided (possibly Typepad). And quite frankly, I'm ready to just dump the whole thing and recreated Barefoot Plumies under a completely different URL with a more reliable (i.e., paid services!) provider. I guess this is my lesson on getting what I paid for, hehe.

Thanks for hanging in there and as always, thanks for all your support and visitations. I would be such a lonely person without you guys!


Read more!

Monday, May 11, 2009

Monterey Pasta Company Lobster Ravioli

On a recent shopping trip to Costco, I kept an eye out for fresh lobster raviolis that my friend L said was really good. So when I saw these in the refrigerator section, I didn't hesitate to pick up a package, especially at about $9 (which should have been an indication as to what's to come).

Actually, it is 2 packages, 16 raviolis in each. The ravioli is a rectangular shape and didn't look quite as "pillowy" as the pictures depicted.

I originally wanted to make a lobster cream sauce to go with it but I didn't have time and had to improvise. I used some previously made and frozen simple tomato sauce, hoping it wouldn't overpower the raviolis.


Sauce was heated up and the raviolis cooked up in matter of minutes (5 to be exact). Plated everything up, sprinkled some cheese and the Mister and I were ready to chow down.

Before taking a first bite, I cut open one of the raviolis and the filing didn't look anything like the raviolis on the package (surprise! not). The filling looked like a lump of white mystery meat of some sort. The red sauce in the picture below is from the tomato sauce, not the red "creamy Newburg Sauce" advertised on the package. As a matter of fact, neither of us tasted any kind of sauciness to the filling.


I was starting to wonder if there was some mix up at the packaging site. Could we have gotten some other kind of ravioli by mistake? After we started eating more, and dissecting what we were eating, I came to the conclusion that this was most likely lobster ravioli since I can taste clams, which was one of the ingredients (maybe they should have called it lobster and clam raviolis). I think I actually tasted a little bit of the lobster (there was some kind of stringy meat which could have resembled lobster).

Anyway. The Mister summed it up pretty well on this meal. Tomato sauce aside (which did kind of overpower the ravioli a tad and I would definitely recommend cream sauce), if no one told us these were lobster raviolis, we would have thought these were some kind of cheese raviolis with maybe some mystery seafood in them, fish perhaps. Overall, it was not a bad meal, it wasn't a toe-curling meal by any means, just a so-so meal that filled the belly. And the Mister said not to buy them again. Oh well. How would you know if you don't try, right?

Hope everyone had a wonderful weekend.


Read more!

Sunday, May 10, 2009

Happy Mother's Day


Wishing mothers everywhere a wonderful day!


Read more!

Thursday, May 7, 2009

Thai Fried Chicken Wings


If I had a dollar for every time I said I love fried chicken wings...

I finally made Pim's Thai Fried Chicken recipe using chicken wings. I had a family sized package in the freezer and have not fried anything in over a month (unheard of!). I like cooking with wings since I seem to have a better handle on cooking it just right. Besides, how can you resist those cute little and delicious drummettes.

I didn't do anything too different from Pim's original recipe. I do, however, like my fried chicken (wings and other parts) very crunchy. So instead of putting straight into the oil after dredging, I let the wings sit a bit to help crust formation. I then dredged it one more time and then shaking off excess flour before putting them into the oil. While one batch was cooking, which took about 7 minutes to cook through and to get a nice golden brown, I would dredge the next batch and let them rest. Then while the oil was getting back up to temperature (350 degrees), I'd dredge them again and then into the oil. If you like the thinner crust, just follow Pim's original directions. Either way, I think you'll love these.

Here's what I modified for the chicken wings.

Ingredients:
3-4 lbs of chicken wings, separated, discard tips
6-8 cloves of garlic, peeled
1 Tbsp coarsely chopped cilantro stalks
1 Tbsp ground black pepper
1 tsp kosher salt (or other course salt)
6 Tbsp oyster sauce
1/3 cup fish sauce
2 cups of rice flour, you might need more if double dredging
Canola oil for frying

In a small food processor, ground cilantro stalks, garlic and salt until you get a rough paste. You can also do this in a mortar/pestle or using the flat side of a wide knife to grind into paste.

In a large container or food storage bag, combine paste with oyster sauce, fish sauce and ground pepper. Add chicken wings and mix until all wings have been coated. Marinate in the refrigerator for at least 3 hours. About half way through the marinating time, retoss to make sure all the wings get equal marination.

In a Dutch oven, add about 1 - 1 1/2" of oil. Heat oil to 350 - 360 degrees Fahrenheit. Preheat the oven to 200 degrees Fahrenheit; put a cooling rack on top of a baking sheet into the oven. This will keep the cooked wings warm and crispy as you finish frying all the wings.

Put rice flour in a medium to large bowl for dredging. Dredge the wings and let rest for a few minutes. I did this while the oil was just reaching 350 degrees F. Dredge the wings again and shake off excess flour and gently put it into the hot oil. I was able to get about 9-10 wing sections into my DO and adjusted the heat to keep the temperature around 315 degrees F. The wings were done around 7-8 minutes.

Drain the wings on paper towel for a minute or two before putting it into the oven. I did this to remove any excess oil that might have been on the wings. Let the oil temperature come back to 350 degrees before putting in the next batch. Continue frying up remaining wings in the same way.

The wings were not greasy at all and were wonderfully crunchy and mouth-smacking good! We had them with some macaroni salad and steamed white rice. Delicious! The Mister said these were the most crunchiest chicken to date and called them "money." What more can I want? Okay, maybe a vacation to Hawaii but I'll take what I can get!

Hope y'all are having a wonderful week. Now go and eat well.


Read more!

Wednesday, May 6, 2009

WOW Grinds Kalbi Kong Challenge Results

I just noticed that WOW Grinds posted the Kalbi Kong Challenge results! Kum Chee Korean Buffet won with Yummy's Korean BBQ coming in second (Yummy's is my second favorite too). What's great is that the Homemade Challenger was 3rd place winnah!

While you're there, check out the mochiko chicken musubi from by Akyth Inc. Looks ono! I might have to try that recipe.

Hope everyone is haveing a wonderful Hump Day. It's half way through the week (come on Friday!).


Read more!

Tuesday, May 5, 2009

Brownie #5

I just couldn't leave well enough alone. It's not as if I had too much time on my hands or something but I decided to tweak Brownie #4, slightly. I've seen some recipes that call for adding instant expresso or coffee to boost the chocolate flavor in chocolate desserts. Instant coffee/expresso is not something I keep on hand. So instead, I decided to try cold coffee (Kona coffee to be specific since that's what we had that morning). Other than some minor modifications to the ingredients, I also baked these a bit longer than the other recipes. In reality, these probably could have withstood another 2 minutes or so since the overall texture is fudgy-soft. As I'm biting into a piece of it right now, I kind of like the fudgy, softer texture this one has.


One thing to note, the batter on this one will be a bit wetter than the previous 2 recipes. Other than that, directions are still the same. One bowl, quick and easy.

Ingredients:
2 large eggs
1 tsp vanilla
1 1/2 C white sugar
1/2 C packed dark brown sugar
3 Tbsp Canola oil (or vegetable oil)
3 Tbsp cold coffee
1 stick melted butter (1/2 cup)
1 1/2 C unbleached AP flour
3/4 C dutch-processed cocoa powder (Callebaut)
1/2 tsp table salt
3/4 tsp baking powder

Preheat oven at 350°F oven.

In a medium bowl, mix together eggs, oil, butter, coffee and vanilla (hand mixed with a wooden spoon). Add both sugars and mix. Let it sit for 5 minutes.

In a large sifter (I use a large fine mesh strainer), combine flour, cocoa, salt and baking powder together. Sift directly into the wet ingredients. (Add optional chopped nuts at this point.) I think sifting the dry ingredients help with a lighter texture, I don't think it's absolutely necessary and can be skipped if you don't have a sifter.

Mix until everything is combined. Try not to overwork the batter at this point.

Lightly spray Baker’s Edge Brownie Pan (or an 8" x 8" pan) with oil. Spread mix into pan. Bake for 22-26 minutes until toothpick inserted into center comes out with light crumbs. Cool completely in pan and cut into squares.

Taste Results:

CAB: Chocolate taste seems smoother than than Brownie 5. Softer and fudgier in a good way. The top has a bit more crust that I like. Don't taste any hint of coffee, as expected. Very nice mellow chocolate aftertaste. Maybe baking another 2-3 minutes will make it more chewy. When I compared the photos to previous experiments, I noticed that this brownie is darker, richer in color. Had to be the coffee.

GP1: Really good chocolate flavor. I think the chocolate taste is better than [Brownie #4]. It's softer and good but maybe needs to be a little chewier. Maybe. It's really good, rich.

GP2: Oh I love all the brownies and this one is really really good. I like the texture of it, soft and rich. Definitely the moistest of all of the brownies so far.

GP3: (MIA)

GP4: I like this one, good flavor. Would be really good with a cup of coffee. Like the texture.

GP5: I think I like the last one better [Brownie #4] but this one is good. I can really smell the chocolate. I like the aftertaste. Might be a bit too soft for my taste but my daughter would love this version.

GP6: This would go really well with nuts (here we go again!). I think the flavor would round out nuts. I like the flavor, it seems to fill my whole mouth and smoother tasting than the last one. Really good, I like the texture, soft but still a bit crusty on top.

Guest GP: This is exactly the way I like my brownies. I love the soft brownies that taste like fudge. You made this from scratch? Really?

Conclusion: Looks like it was split between the panel on the texture, some liked it more than others. I think I'll make this again this weekend and bake it a bit longer to see how the middle sets up. But it was pretty unanimous that the coffee did enhance the chocolate flavor, considering that this version had 1/4 cup less cocoa powder and the exact same amount of sugar.


Read more!

Sunday, May 3, 2009

Buga Korean BBQ Restaurant

My favorite Korean BBQ restaurant is Buga. I crave it quite a bit and can eat there all the time. No joke. I've even been known to choose it above my favorite "special occasions" restaurant (The Oceanaire). A few things have changed since Kirk's (mmm-yoso!!!) first review back in 2005 (here) and my first visit to Buga. (Read Kirk's other posts here and here.)

The panchan, although still the best around, has become somewhat "standardized" and less seafood ones (haven't been served any seafood panchan in a long time). I sure do miss those tiny anchovies.


The top 2 dishes are the rice paper and daikon radishes used for wrapping the meat, yum! And a couple of other panchan dishes on that day.

Buga's price has always been a bit higher than other K-BBQ places but the meat quality, IMHO, is also still the best around. We always get 2 orders of galbi (need 2 orders or more of meat selection for grilling with maybe a couple of exceptions).

Service has not changed, still smiling faces, friendly servers, and sometimes still hurried when the restaurant is full.

One of the items that comes with the meal is Gyeran Jjim (steamed egg). I forgot to take a picture of it while it was still "poofy" but here it is after it deflated (kind of souffle-like). Sorry the picture was a bit blurry. The Blackberry isn't known for its photo quality. I love this stuff. My mom and grandmother used to make this for me for breakfast on weekends when I was a kid. I used to like to add just a tad of soy sauce on top but I like to eat Buga's as is. Even the Mister has gotten into it lately.

Every so often when we're really really hungry, we also order the Daeji Bulgogi (Spicy Marinated Pork) along with the galbi. I usually take some of this home, which makes for a great leftover! Next time we order it, I'll add a picture.

Although a little pricier than other Korean BBQ places, I still think Buga is the best Korean BBQ place in town. Certainly worth splurging for.

Buga Korean BBQ Restaurant
5580 Clairemont Mesa Blvd.
San Diego, CA 92117
Open daily 11:00 am to 11:00 pm


Read more!

Friday, May 1, 2009

May Day is Lei Day

I loved May Day when I was a kid. The schools would plan for days for May Day Celebration. Family and friends would come and watch all the songs and dances from each class. My mom would always take that day off from work to come see my school's performances. I remember climbing those gigantic plumeria trees in the back courtyard the day before to make leis for my Mom and me to wear. If I close my eyes, I can still smell the scented air from those trees.


The first Lei Day was held on May 1, 1928 and the phrase "Lei Day is May Day" was coined by Grace Tower Warren. It was made an official holiday in 1929 in the territory (before Hawaii achieved statehood in 1959 as the 50th State in U.S.). Did you know that each Island has its own lei? You can read all about it here.

If you're lucky to be on O'ahu today, stop by Kapi‘olani Park for the Lei Day Celebration. If you're into making leis, it might not be too late to enter the lei contest (rules here). You can also check Honolulu.gov for more Lei Day celebration information.

Happy Lei Day, everyone!


Read more!

Thursday, April 30, 2009

Crazy Crazy Days

Yes, I've been a bit neglectful of my posts. But I have an excuse, a really good excuse. A few weeks back, we had some water damage in the house that required a major bathroom remodel. Whole room got gutted. If there was ever a time to be thankful for home insurance, this sure was one of them.

Nonetheless, it still has been a headache. In the midst of all this, we also decided to put down some hardwood (laminate, actually) flooring in one of the bedrooms. What crazy DIY bug bit us, I don't know but we piled it on. So the house has been in an upheaval state for what seems forever and slowly getting back to normal, sort of. At least we're done with the flooring and hopefully by this weekend, I'll have my office back (the Mister exercised squatter's rights), computer back up, and back to normal posting.

With everything so chaotic, not too many interesting things on the food front. We tried to go to Poway Sushi a couple times for an early dinner but guess they are so popular now that unless you get there right when they open (5 pm), there will be at least a 30-45 minute wait. We even got there at 5:30'ish one evening and there was already a 45 minute wait. I don't have much patience these days so we drove over to Buga Korean BBQ and we were happy. This reminds me that I have yet to do an official post on Buga with pictures and all.

Plans for these weekend, use the Thai Fried Chicken recipe on chicken wings and tweaking Brownie #4 recipe (been in a bit of brownie withdrawal).

Hope everyone is staying healthy and eating well.


Read more!

Thursday, April 23, 2009

R & B Filipino Cuisine

I have a fondness for small, "family owned" type restaurants. R & B is one of those places and has been on my lunch rotation list for quite some time. I realized earlier this week that it's been a couple months since I've been and took the opportunity to get some take-out the other day while I was driving by (going back to work from lunch, no less). Yeah, I had lunch already but why not take something home for dinner? I also realized that I've never posted a review on them so why not knock out 2 birds with 1 stone!

R & B is a "turo-turo" place and offers quite a few entrees daily. Before I started this post, I remembered that Kirk (mmm-yoso) had posted something on them awhile back (read his review here). I chuckled when I reread his review because we ordered almost the same thing.

As a creature of habit, I get the 2 item combo: 2 entrees and 1 starch. I like to split my starch and get 1/2 and 1/2: half steamed white rice and 1/2 pancit. As far as entrees, I almost always get the lechon. And most times, it's pretty good. On this day, it was pretty good with crispy skin a thin layer of fat and not greasy, although a couple of pieces were a bit chewy. You can see all the "stuff" in the pancit and there was a decent amount of shredded chicken in it along with the veggies. The pancit was good, not soggy/mushy or greasy.

For my second entree, I chose chicken mechado. Sorry the picture doesn't do it justice but it was really good. This was the first time I've seen "chicken" mechado at R & B, typically I see beef mechado. I hope they bring this back as a regular.

I had also ordered a small side of Sisig since it looked good. But I was too busy stuffing my face and didn't realize I forgot to take a picture of it before it was too late. It had lots of tang to it and a good amount of green onions. I enjoyed it with the rice. Now a disclaimer here. I've only had Sisig at R & B so I can't give a comparison. I'll try to make a mental note to order more sisig at other places when I see it.

The total for the 2 entree combo and a side of sisig came to $8 and some change. I had enough food to feed me and the Mister. A pretty good bargain and tasty dinner. Oh, I should also mention that they do catering too.

R & B Filipino Cuisine
11257 Camino Ruiz
San Diego, CA 92126
Mon-Fri: 9:30 am - 7:30 pm
Sat: 8:00 am - 7:00 pm
Sun: 8:00 am - 6:00 pm


Read more!

Monday, April 20, 2009

Weekend Update (4/20/09)

Woo doggy was it hot yesterday! It was 96 where I was but it didn't stop us from working in the yard or eating. Unfortunately no pictures of anything we ate. Well, actually that's not true. I did take pictures but they all turned out blurry and crappy. Not a single food picture turned out. Not a one. I've had it with that Casio and now just waiting for my new camera to arrive tomorrow!! So until then, you'll have to settle on no pictures. (You suck.) I know...

Anyway, we took a drive down to Linda Vista on Saturday to have lunch at Sab-E-Lee. You can read the previous review here, with pictures. It was 11:30 am when we got there and already 4 tables full (the place only sit about 20 people at 6-7 tables). We ordered Phad Thai with shrimp (it was okay, a little sweeter than usual), Nahm Tok (love this dish), and Thai Sausage Fried Rice (another must order for me). We also decided to try something new and got the Fried Chicken Wings (how I love my fried chicken wings). I wish I had my camera for this because it was so crunchy and had bits of sauteed garlic spread on top. It came with a sweet dipping sauce but I ate the wings as is. As usual, we always order more food than we can eat so we could have leftovers!

That evening, I made chicken katsu to have with the leftover Thai Sausage Fried Rice but I'll save that for another time so I can get some pictures of the chicken katsu as well as the recipe, which is really simple. I'm still tweaking the katsu sauce so hopefully by the time I post, I'll have worked out the kinks.

Well, that's about it for today. Hope everyone has a great week. Now go and eat well, even in this heat!


Read more!

Friday, April 17, 2009

Friday Trivia

Just some mindless Friday food trivia to help us get to the weekend!

Did you know celery has negative calories? Yup, it takes more calories to eat a piece of celery than the celery has calories.

Cabbage is 91% water.

A raisin dropped in a glass of fresh champagne will bounce up and down continually from the bottom of the glass to the top. (Who discovered this one????)

Boiling the cork for a few minutes makes it easier to place it back into a wine bottle.

The flavor "bubblegum" is a combination of wintergreen, vanilla and cassia, a form of cinnamon.

Pineapples are classified as berries.

The most widely eaten fish in the world is a Herring.

No parts of a banana is used to make banana oil, which is a synthetic compound made with amyl alcohol, is named for its banana-like aroma. (I remember the entire O-Chem lab class sniffing this stuff.)

The literal meaning of the Italian word linguine is "little tongues."

That's it for this Friday. Have a wonderful weekend!


Read more!

Thursday, April 16, 2009

Brownie #3 and #4

The delay in making Brownie #3 got the Brownie Guinea Pig Panel grumpy and anxious. As a matter of fact, one of them was quite demanding on getting his brownie fix, me being sick or not. Sheesh. It's not like there's crack in these brownies or anything (as far as they know).

Brownie #4 - Winner!

To get back at the demanding bunch, I decided to do something a little different, bwahahaha! Instead of tweaking Brownie #2, I decided to make Cook's Illustrated Chewy, Fudgy Triple Chocolate Brownies. I wanted to make these not just to mess with the BGPP but to see how brownies that use melted chocolate taste compared to only cocoa powder.

I used Baker's semi-sweet and unsweetened chocolate since it's what I found at the grocery store, and the Callabaut cocoa powder. Well, I was quite disappointed with the CI brownies overall on 2 counts. From a preparation standpoint, it took twice as long to make than any of the other brownies (double the amount of bowls and utensils) and the recipe's bake time was way too long to actual bake time (actual 25 minutes vs the recipe's 35-40 minutes). I can't imagine what they would have tasted like if I would have gone the full baking time that the recipe called for. Thank goodness I checked it when I did.

From a taste standpoint, it was chocolaty but it lacked depth and sweetness, and it left a funny aftertaste. This could have been a by-product of the chocolates I used. But the biggest thing, IMHO, was the amount of sugar to the amount of chocolate was not right. For me, brownie needs to have a good sweet to chocolate ratio, CI's brownies didn't have it. As a matter of fact, I rate these just slightly above Alton Brown's Cocoa Brownies, which is not very good.

The BGPP feedback was almost unanimous that CI brownies were not anywhere near as good as Brownie #2. GP2 was the only one that thought this was good. GP5 and 6 also thought there was kind of a weird aftertaste. But GP5's comments summed it up perfectly, "These brownies didn't make me want another piece."

So with my disappointment hanging over me, I had to immediately work on Brownie #4. The Mister said my reputation was at stake and I had to redeem myself. Guess I got my payback for wanting to mess with the BGPP.

For Brownie #4, I went back to Brownie #2 and decided to work on increasing the chocolate factor without losing the texture or the simplicity. I also wanted to try to simplify the ingredients list, if I can.

Ingredients:

2 large eggs
1 tsp vanilla
1 1/2 C white sugar
1/2 C packed dark brown sugar
1/4 oil (Canola)
1 stick melted butter (1/2 cup)
1 1/2 C unbleached AP flour
1 C dutch-processed cocoa powder (Callebaut)
1/2 tsp table salt
1/2 tsp baking powder

Preheat oven at 350°F oven.

In a medium bowl, mix eggs and vanilla (hand mixed with a wooden spoon). Add sugars and mix. Add oil and butter, mix well.

In a large sifter (I use a large fine mesh strainer), combine flour, cocoa, salt and baking powder together. Sift directly into the wet ingredients. (Add optional chopped nuts at this point.) I think sifting the dry ingredients help with a lighter texture, I don't think it's absolutely necessary and can be skipped if you don't have a sifter. Mix until everything is combined. Try not to overwork the batter at this point.

Lightly sprayed Baker’s Edge Brownie Pan (or an 8" x 8" pan) with oil. Spread mix into pan. Bake for 22-26 minutes until toothpick inserted into center comes out with light crumbs. Cool completely in pan and cut into squares.

* If you want to add nuts, add 1 cup of chopped nuts after sifting dry ingredients into the wet ingredients.

Taste Results:

CAB: Chocolate taste is more intense than Brownie 2. Had a very good texture, slightly crunchy on top but soft and chewy in the center. Still maintained the good slight fudgy mouth feel on the inside. Very nice chocolate aftertaste.

GP1: Mmm, really good. I like the soft texture in the middle. Good chocolate flavor. Definitely better than Brownie 3, think it's better than Brownie 2.

GP2: Oh, this is good, really good. I like the texture.

GP3: (MIA)

GP4: Thumbs up on this one. Don't ever make that CI brownie again.

GP5: Wow, this one stays with you, like a brownie should. I really like the texture of the outside and then the chewiness on the inside. Really good, I think I like this one better than Brownie #2. I would make this one at home. I want the recipe. (A little later: This is good. Yup, it's good. I want the recipe.)

GP6: Really good. I like the flavor of this one.

So there you have it. Brownie #4 is the winner in taste and quick preparation. Almost as easy and just as tasty as Betty Crocker brownie in a box. It took <10 minutes from set up to final batter. Then another 24 minutes in the oven. I don't think I can streamline it to be any easier than this for homemade brownies. The hardest part is waiting for these to cool.

Maybe the future of the Brownie Experiment is to play around with variations of brownies (e.g., cheesecake brownies). We'll just have to wait and see.

Looking forward to the weekend. Now go and eat well.


Read more!

Wednesday, April 15, 2009

Wednesday Ramblings

Just a couple of quick things today. While reading WOW Grinds upcoming Best Kalbi Challenge (I can't wait to see the results!!!), I realized that I haven't had kalbi in a while, which is unsat! Mental note, make kalbi soon, like this weekend!

Anyway, I think I was drooling when I was reading about the challenge (can't wait to see the results! Awk! I'm repeating myself.) and if it's anything like their other challenges, it'll be awesome. I was glad to see Yummy Korean BBQ on the list and not surprised it had the most votes, #2 on my list for kalbi. I wasn't surprised one bit that my favorite didn't make it on the list. That's because I think Mark's Drive Inn (Aiea/Pearl City) is one of the best kept good cheap eats secret on Oahu. You won't find a lot of reviews about Mark's, as a matter of fact, there has only been 1 write-up that I've ever found dated back to 2002. A sample of the menu can be found here. Boy, reading all this stuff makes me long for the Islands. It's been way too long since we've been back. Sigh...

Other ramble, I made Thai fried chicken a few days ago and finally got a decent picture of it. Yum, I can almost smell them just by looking at the picture. I used a Dutch oven this time versus a cast iron skillet and the results were much better. The drumsticks cooked faster and the crust turned out better. I'm not exactly sure why but I'm guessing it has something to do with the walls of the DO. The Mister had similar results with his pork chops and agrees with me. Maybe the taller sides builds up more steam and/or keeps the temperature more consistent? Maybe it's along the same concept as Cook's Illustrated recommendation for putting the cover on while frying chicken. Either way, I think we'll stick with the DO for frying chicken from now on.

Well, that's about all for today. Hope everyone is have a good week. Friday can't come soon enough for me!


Read more!

Monday, April 13, 2009

Homemade Pasta

I dusted off the manual Atlas pasta machine this weekend and made sure everything still works (just like new!). Dinner plan was simple, bake some French bread, make fresh fettuccine pasta tossed with some Bolognese sauce. The only thing left was to decide which pasta dough recipe to use.

After looking through some cookbooks and searching online for some recipes, I settled on a very simple egg and flour recipe. One author in an Italian cookbook suggested not using Semolina (Durum) flour since it has a tendency to be gritty. She found that home cooks have better success with unbleached all purpose flour. Her description of gritty was exactly the experience I had with Semolina flour so I decided to follow her advice.

I followed the 1 cup of flour to 1 egg formula but also decided to add a pinch of salt to each cup of flour. Some recipes called for salt, some didn't. I chose to add salt because I felt without it, the pasta might not be as tasteful. I think salting the water would add flavor when cooking but I wasn't sure how much since fresh pasta only takes about 2 1/2 minutes to cook. The following recipe will yield about 1 pound of fresh pasta and feeds 3-4 people. I also used my standing mixer to do the initial mixing and finished with hand kneading.

Ingredients:

2 cups unbleached all purpose flour plus extra for dusting
2 pinches of salt
2 large eggs

Directions:

In a electric mixer fitted with the paddle, combine flour and salt. I used the paddle since it mixes ingredients better than the dough hook and I was going to knead by hand. Add the eggs and mix until all the flour is combined. You may need to scrape down the sides to get all the flour incorporated.

If you don't have a mixer, you can do everything by hand. Mix the flour and salt together and form a mound on a flat work surface. Make a well in the center. Add eggs into the well and lightly beat with a fork. You can use your hands too, if you prefer. Gradually beat in flour from the inside wall of the well in a circular motion. Try to keep the sides of the well intact with your other hand as you're beating. Continue until all the flour is incorporated and you can form a ball.

Flour the work surface and begin kneading the dough. There are several good videos on YouTube that shows how to mix and knead the dough. Knead the dough until it is elastic and smooth, about 8-10 minutes. Dust the work surface and/or dough with flour during kneading to prevent sticking; a bench scraper is useful to scrape sticky dough off the work surface. You can also get a plastic bench scraper for about $1, and they work great too. The end product should not stick to your hands.

Cover the dough with a cotton kitchen towel and let rest for at least 30 minutes. You can also wrap the dough in plastic wrap but you might want to brush the surface with a very light coating of olive oil to prevent sticking.

Cut the ball of dough into thirds, cover the pieces you are not using to prevent drying. Dust the work surface with flour. Press a piece of dough into a rectangle and sprinkle both sides with flour. On the widest setting (#1 on my Atlas), roll the dough through the pasta machine. Fold it over on itself into thirds (like a business letter), dust the sides and roll through the pasta machine. Repeat 2-3 more times. The surface of the dough should be smooth.

Reduce the roller width by 1 setting and roll the pasta through through 2-3 times on each setting. Continue reducing the rollers width until the desired thickness is reached (#5 on my machine for fettuccine). Dust the sheet of pasta as needed to prevent sticking to the rollers.

Once the desired thickness is reached, roll the sheet of pasta through the pasta cutter. The pasta can also be cut by hand: dust the top of the sheet with flour; starting on a shorter side, roll the pasta sheet like a jelly roll; using a sharp serrated knife, cut into the desired width. For fettuccine, cut about 1/4", wider for parpadelle (5/8" to 1").

Separate the cut pasta and dust lightly with flour to prevent sticking. You can dust with cornmeal. The cornmeal will separate from the pasta when cooked and won't affect the end result, but you'll have cornmeal floating in your pasta water. I prefer to dust with flour.

Lay out the pasta on a cotton towel to dry a bit or hang from a pasta drying rack. Finish remaining pieces of dough. An interesting trick I read on a food forum for a make-shift drying rack is to cover a broom stick with plastic wrap and then laid out on the back of 2 chairs. Then hang the cut pasta on the broom stick.

You can also freeze extra pasta. If you are going to freeze, make sure the pasta is completely dry (will take several hours) before storing in freezer bags. You can make small birds nest (like the picture below) and let them dry that way. When ready to cook, you can put the frozen pasta directly into boiling water (no need to defrost) and will take about 3-4 minutes to cook.

The results: I really enjoyed the fresh pasta, it had a very nice tooth and I thought the thickness was just right. It was perfect with the bolognese sauce. Got thumbs up from the Mister and one of the Eating Machines. I think this pasta dough will work nicely with ravioli (next on the list).

On a side note, I got a little crazy with bread making that day. I made 2 batches of French bread baguettes, 1 sourdough, 1 regular. Guess I was making up for time lost for those 2 weeks I was sick (hehe). Most of the loaves found loving homes to go to since there's no way we could have eaten through all of these.

Hope y'all had a wonderful weekend. Have a great week. Now go and eat well.


Read more!

Thursday, April 9, 2009

Don't Get Your Panties in a Bunch

I think food bloggers must have really tough skin. I mean why else would we put ourselves out there like a big round bull's eye, fully exposed to any half-witted Tom, Dick or Harry (or Jane for that matter) who hides behind a cloak of anonymity when posting comments? You know the old adage, "opinions are like assholes and everyone has one..."

I've got one too and here's mine for the day. Think about what you write in the comments section of someone else's blog before you post. Just because your name isn't attached to it, it doesn't mean you should be displaying your ignorance and your shoe-sized IQ openly. Well, that is unless you are too stupid to know that you're, well, stupid. (And we know who you are, we have ways, bwahahahaha!) And don't say your comments are with good intentions because we all know about good intentions, as Samuel L. Jackson will explain in one of my favorite scenes from Pulp Fiction.


Read more!

Tuesday, April 7, 2009

Pistachio Recall

Setton Pistachio has expanded their voluntary recall of pistachios. The press release can be found here on the FDA's Recall webpage. The recalls affected bulk items to commercial custormers as well as some packaged products (Trader Joe's being one of them). Check the press release for complete listing of recalled products.

Any consumers who have purchased retail products being recalled should return them to the place of purchase or destroy them. Setton Pistachio has established a toll free number, (888) 228-3717, for consumers to call for further information, Monday through Friday 8 am to ­5 pm EDT.


Read more!

Monday, April 6, 2009

Recovering and Looking for Inspiration

So it's been almost 2 weeks since the start of this nasty flu and I think I might have finally turned the corner (oh please let it be so). My appetite still hasn't come back yet (no appetite? you must really be sick!). I actually had enough strength this weekend to whip together some bolognese sauce so the Mister can have a decent dinner after working all day. At least it was better than laying on the couch, feeling sorry for myself (hehe).

As the bolognese sauce simmered, my mind wandered off somewhere, la-la land perhaps (cold medicines can do that, you know), and I started to think about fresh pasta (pasta fresca). I was thinking back about 10+ years when I first made pasta using one of those electric pasta machines that extruded dough through a die. Yuck, just thinking about it makes me want to hug my box of Barilla. Ever seen Office Space? You know that scene where the guys smash that copier? Yeah, that's what I'd do to that pasta machine if we still had it (where's that baseball bat of mine?). Of course the song playing in the background from that scene is rolling in my head ("damn it feels good to be a gangsta") Oh right, back to the pasta.

Granted I am a bit more culinary astute now (funny the things drugs make you say and think!). And then my mind wandered off to the manual pasta machine I have, tucked high and away in the back of the upper cupboards, far far from sight. Heck, I can't even remember what brand it is, Atlas? Insperia? Did it even come with a cutter? It's been so long, I can't remember.

So today, sitting at work, I vaguely remember telling the Mister just before I got sick (which seems so loooong ago) that I wanted to make lobster raviolis. But sitting here in my congested stupor, I think I'll tackle a simple pasta first, like Tagliatelle or Fettuccine. Besides, I've got extra bolognese sauce in the freezer that would go well with either. Okay, so now I have a plan, a bit of inspiration to help get my appetite back. I'm going to go home tonight and dig out that pasta machine. Who knows what might come out of this. (Sing along now! "damn it feels good to be a gangsta...")


Read more!

Thursday, April 2, 2009

Where's CAB?

Sorry it's been a bit stagnant here this past week. Contrary to popular believes, I'm still alive, battling back from the nastiest flu ever. I didn't get a chance to make Brownie #3 but hopefully this weekend.

Hope everyone is well and having a good week. And if you don't have this flu bug like I do, you are at least doing better than me! Be back soon (egad, I hope! hehe).


Read more!

Tuesday, March 24, 2009

Sweet Home Chicago Pizza (NY Style)

We enjoyed the Chicago-style Deep Dish pizza from Sweet Home Chicago Pizza (review here). But we also wanted to try their NY-style pizza, both of us fans of thin crust and all. I think read somewhere on Yelp that they had bought Coney Island's recipe when they purchased the place. And since Coney Island had some decent reviews when they were in business, we were looking forward to trying the NY-style.

As last time, the person taking the order was very pleasant (according to The Mister). We decided to try the Coney Island Deluxe. 40 minutes later, pizza was here!


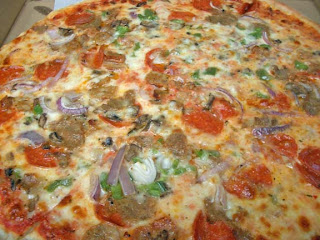
As you can see, there's lots of ingredients on the pizza. They used red onions rather than yellow onions, which is fine. The pizza was cut into large slices, good for folding. The sausage was decent and pepperoni is, well, pepperoni. What we were disappointed in was the crust and the sauce. The crust had a good pull and chewiness to it but was very bland, almost like cardboard. The sauce was quite salty and I really didn't care for it at all. Bottom line, neither of us liked the pizza.

I had told The Mister my skepticism about a pizza joint that makes deep dish AND NY-style pizza. Is it possible we found a restaurant can do both types well? Unfortunately, if I was judging SHCP by the Coney Island Deluxe, the answer would have to be no. I think we're going to stay with the deep dish.

Sweet Home Chicago Pizza
14034 Poway Road,
Poway, CA 92064
858-668-3215

Hours:
Mon-Thu. 11:00 a.m. - 9:00 p.m.
Fri-Sat. 11:00 a.m. - 10:00 p.m.
Sun. 11:00 a.m. - 9:00 p.m.


Read more!

Monday, March 23, 2009

Brownie #2

Encouraged by the taste of Brownie #1, Brownie #2 was focused on the texture more so than the flavor. My original thought was just to add some leavening (i.e., baking powder) which I believe would solve the height issue and give the texture a bit more...fluff without being cakey. On the morning of testing, I decide to also adjust for volume also since I was going to use the Baker's Edge pan.

I started out with 2 tablespoon of water but after mixing everything together, the batter seemed a little dry, so I added an extra tablespoon of water. Hard to say whether it needed it or not but the batter was a little easier to spread. I also changed the white sugar to dark brown sugar ratio since brown sugar is suppose to help with the chewiness.

Since I wanted to increase the batter amount, I had to adjust the egg content to compensate for the increase in flour. I used a Cook's Illustrated trick for chewiness by only adding egg white. This should also keep the brownie from getting cakey (ick). I think the adjustments were spot on as to what I thought they would produce. Taste test results are after the recipe.

Brownie #2

Ingredients:
1 whole egg + 1 egg white (large eggs)
1 tsp vanilla
1 1/2 C sugar
1/2 C dark brown sugar
1/4 oil (Canola)
1 stick melted butter (1/2 cup)
3 Tbsp water
1 1/2 C unbleached AP flour
3/4 C dutch-processed cocoa powder (Callebaut)
1/2 tsp table salt
1/2 tsp baking powder

Preheat oven at 350°F oven (using Baker’s Edge Brownie Pan pictured below).

In a medium bowl, mix eggs and vanilla (hand mixed with a wooden spoon). Add sugars and mix. Add oil, butter, water and mix well. Don't worry if there is a bit of separation of the melted butter and/or oil on top. It'll all get blended together.

In separate large bowl, sift flour, cocoa pwder, baking powder and salt together. I sifted this time to help with the height. I think you can get away without sifting. You can also sift all the dry ingredients directly into the wet ingredient bowl (saves on clean-up). Add the wet ingredients to the dry and mix just until incorporated.

Lightly sprayed Baker’s Edge (or an 8" x 8" pan) with oil. Spread mix into pan. Bake for 25-30 minutes until toothpick inserted into center comes out with light crumbs. Cool completely in pan and cut into squares. Here's what it looked liked in the Baker's Edge pan.


For the taste test of Brownie #2, I had 2 extra volunteers. So there will be 2 additional Brownie Guinea Pigs to this taste test panel (hehe).

CAB: Chocolate taste is still good, but not as intense as Brownie 1 (expected since the flour ratio is a bit higher). The baking powder really gave a good rise and improved the texture with a little bit of fluffiness, almost with slight fudgy mouth feel on the inside. Sides were chewy, but delicate, not tough or hard. Probably could be a little more chewy for me. Adding egg white did not make it cakey. Really enjoyed the feel and taste of brownie. Good chocolate aftertaste.

GP1: Really good texture. Lighter than the first one. Good flavor. Like it better than the last one.

GP2: Really like this one. Tastes really good and is a little fluffier than the last one. Liked it better than Brownie #1.

GP3: This one is good just the way it is. Really good. Wouldn't change this one.

GP4: Really good but maybe a bit too sweet? I don't know. Maybe it's because I just like my brownie with nuts in it.

GP5 (new): Really good. Not too sweet, chewy, really nice flavor. Not cakey (a good thing). I'd make this one at home.

GP6 (new): I think this one is really good, wouldn't change a thing on this. Maybe add some nuts.

So it was unanimous from the GPP (Guinea Pig Panel) that this was "The" recipe to stay with. I'm a bit surprised that it only took 2 recipes to reach this stage. I think I would like to try to see if I can turn up the chocolate taste in this one a bit more since it wasn't as intense as the first one. Also, every GP liked nuts in their brownie, I'm the odd one out.

So for Brownie #3, I'm going to add a traditional nut and a not-so traditional one. I threw my thoughts out to 2 GPs and they both agreed the nontraditional nut might be very interesting and potentially really good. I'll also work on increasing the chocolatiness, too. Maybe using an Ina Graten trick that she's used in the past for her baked chocolate goods.

Postscript: I completely forgot to mention how I liked the Baker's Edge Pan. I thought it did a great job baking the brownie evenly. Every portion I cut was the same as the others. I was a little surprised by the weight of it , much heavier compared to my square baking pan. Although this "might" be a uni-tasker pan for now, I really like it.


Read more!

Friday, March 20, 2009

Oxtail Noodle Soup

Here's the picture from the last post as a teaser. Well, it was sort of a tricky one since it's not duck noodles but rather stewed oxtail noodle soup with roasted duck! Surprise!!

See if I posted this picture (without the duck, of course), it would have been a dead giveaway. hehe.

A couple of weeks back, I decided to get some oxtail from 99 Ranch since they looked so good, even with the sticker shock of $3.99/lb. Sheesh. I haven't had oxtail since I was a little girl (long, long time ago in a galaxy far far away....) and since The Mister has never had oxtail soup, I thought I'd make it (it took a bit of convincing). I followed my Mom's recipe, which was from a very old Chinese cookbook. The recipe is very easy and quite good.

We had one of the eating machines over that night and since I wasn't sure I had enough oxtails for 3 people, I decided to heat up some leftover roast duck from Jasmine Seafood as a supplement. The pairing of the duck and the oxtail was really good! Baby bok choy was the choice of greens that night.

Ingredients:
2 lb oxtail
5 large slices of ginger root
2 green onions (scallions)
1 Tbsp Szechuan peppercorns (I didn't toast mine)
1 star anise
3 Tbsp cooking wine (I used Shao Xing wine) or sherry
8 C water
1 Tbsp kosher salt
Baby bok choy, quartered (I had 3 bunches per person)
1 lb of Chinese dry noodles
Water for blanching oxtail and bok choy

Garnish for each bowl:

1/2 Tbsp green onions, chopped
1 tsp soy sauce
1/4 tsp sesame oil (optional)
pepper to taste

Directions:
Fill a large pot about 2/3 with water and boil. Blanch/parboil the oxtails in boiling water for about 5 minutes. Supposedly this is to get rid some of the "stuff" that you don't want in your soup (blood, impurities, etc.). Remove the oxtail and dump the water.

In a 5 quart dutch oven or heavy pot, add ginger, 2 green onions, Szechuan peppercorns, star anise, cooking wine, 8 cups of water, kosher salt, and blanched oxtail. Bring to boil and then simmer for 2 hours until the meat is soft and the liquid has reduced down to about 6 cups. Add more salt to taste. Set aside.

In a large pot, bring 6 cups of water to boil. Blanch the bok choy until just tender. Remove. Using the same water, cook noodles according to package instructions. The ones I used call for boiling for 4 minutes.

In each bowl, add garnish ingredients. Ladle oxtail broth into each bowl. Add cooked noodles, oxtail and bok choy. And if you just so happen to have some leftover roast duck or chicken, top off with a couple of pieces to finish the dish.

Even though The Mister is not a gelatinous meat type of person, that's my department, he did enjoy his oxtail noodle soup. Eat Machine1 liked it and for once, she didn't finish everything. Those oxtails are pretty filling.

Hope everyone has a wonderful Aloha Friday and a terrific weekend!


Read more!

Wednesday, March 18, 2009

Wednesday Babblings

Just a quickie today. I finally broke down and ordered the Baker's Edge Brownie Pan. I figured it would really come in handy during the Brownie Experiment. I'll have it before the weekend and will try it out on Brownie #2!

A couple of weeks ago, I was flipping through some cookbooks my Mom had given me a long time ago. I don't recall trying a single recipe from these books so I finally decided to try one. I don't have the recipe with me so I'll just stop here and tease you with a picture of the final result. Yum! Looking at this now is making me crave for a big bowl of it. Can you guess what it is?


Read more!

Tuesday, March 17, 2009

Brownie #1

As I mentioned in the last post, I was ready to test out recipe no. 1, which I will call Brownie #1 (original, isn't it?). I had some handwritten notes using Betty Crocker Supreme Brownie mix as a guide. I made notes as I went along the baking process, adjusting ingredients here and there. This is what I came up with. The ingredients I used were what were on hand (like dark brown sugar vs. light brown sugar). I hand mixed everything with a wooden spoon. Review follows the recipe.

Ingredients:
1 egg
1 tsp vanilla
1 3/4 C granulated sugar
1/4 C dark brown sugar
1/4 Canola oil (any vegetable oil would do)
1 stick butter (1/2 cup), melted
2 Tbsp water
1 C unbleached all purpose flour
3/4 C dutch-processed cocoa powder
1/2 tsp table salt

Preheat oven at 325 degrees F.

Grease a square 8" pan. I didn't use a foil or parchment paper sling but you can do that if you prefer. I didn't have a problem getting the brownie out of the pan without a sling.

In a small bowl, mix egg and vanilla. Add sugars and mix well. Add oil, melted butter, water and stir until everything is incorporated.

In a large bowl, combine flour, cocoa and salt. Add the wet ingredients to the dry and mix just until everything is incorportated. It's okay if there are lumps. The reason why I did it this way is because I find that sometimes it's easier and a bit faster to incorporate ingredients this way.

Spread mix into greased pan. Bake for 25-30 minutes, or until a toothpick inserted into the center comes out clean. Cool and cut into squares.

First impression: the brownie had absolutely no rise (not surprised but more on this later), had a great dark color (yea, Callebaut!), and the top was nice and crackly, like Betty Crocker's brownies.

First taste: Very nice chocolate flavor, rich, good sweetness/chocolate balance, very dense, a tad overbaked--the sides were too crunchy but the center cuts were nice and moist. Surprised how rich it tasted with only 1 stick of butter. A slight fudge texture in the center squares.

I had thought about doing a whole "taste test" questionnaire but bah, I was too lazy. I did, however, bring some to work and solicited some of my friends, a Brownie Guinea Pig Panel if you will, to help rate the recipe. No official questionnaires, just verbal feedback. The BGPP consists of 5 guinea pigs, GP1 through 5, me included. Here are the feedbacks from the other 4.

GP1: Edges were too dry, but the flavor was really good. Didn't think it was too sweet, just right. The center cuts were moist. Good texture. Thought would hold up nicely to ice cream without getting all soggy.

GP2: Like it just the way it is. Perfect for brownie sundaes. Tasted really good, and loved the textured. Doesn't want anything changed. Will be a guinea pig for anything I want to bring in for a taste test. (That's so sweet!)

GP3: Mmmm, really good. Can't talk, I'm chewing. When's the next batch? (Okay, I see how this GP is going to be.)

GP4: Tastes good, dense but doesn't seem heavy. Chewy. I like it.

Adjustments for Brownie #2: As I mentioned, there was no rise whatsoever and I think adding some baking powder might help. Reduce the cooking time to 25 minutes (down from 30 min) and when the toothpick comes out just a little crumbly. I also might increase egg to 2 but it might require an adjustment on the flour. I will keep the cocoa to sugar ratio as it for right now since taste was rated pretty high across the panel.


Read more!

Monday, March 16, 2009

The Brownie Experiement

I received my 2 tons of Callebaut cocoa powder Thursday of last week. Actually, it was really 11 lbs but 2 tons sounds funnier. Anyway, I didn't waste any time to start what I've now dubbed my "Brownie Experiment." Would you believe out of 8 different dessert-specific books, there was only 1 traditional brownie recipe? Every other recipe was some sort of spin on the plain brownie (raspberry brownie, swirl brownie, caramel brownie, brownie cheesecake, etc.). Not that those recipes aren't good (at least sounded good) but I really just want a plain brownie recipe without having to buy it in a box.

After 2 hours of searching, reading, and more searching, finally settled on 3 different recipes out of the vast variations, some calling for melted chocolates, others for a combination of chocolates and cocoa powder. I chose the ones that just use cocoa powder, well...because I have 11 lbs of cocoa powder.

The first recipe I made was Alton Brown's Cocoa Brownies. All I can say is these were the worst brownies we've ever tasted. Yes I followed the actual recipe from the episode (which differs from the one posted on FN), no I didn't overmix the batter, no I didn't overbake it. The taste was so bad that I chucked it right into the garbage. Didn't even contemplate bringing it into work to feed the vultures. (Come on, it couldn't have been that bad.) Really, it was that bad. Even if I could get pass the cakey texture (which I didn't like at all), there was no sweetness to the brownies whatsoever. It tasted like a cocoa powder cake. Yuck! The only thing it had going for it was that it was moist. Funny part was that I couldn't even use the Callebaut cocoa powder because AB called for natural cocoa powder! Maybe that's a good thing since it would have been such a waste of good cocoa powder. Not that I think dutch-processed would have improved it. Nothing could have saved the brownies, not even a medicinal herbal addition. Not that I would know anything about those sort of things (really).

Such a dismal outcome made me decide not to even bother with the other 2 recipes. The conclusion I came to was that most of these brownie recipes had too much egg resulting in a cakey like consistency. Hey, if I wanted chocolate cake, I would bake a chocolate cake, okay? Any recipe that called for more than 2 eggs was immediately dismissed. But that left me nowhere. Well, hell, now what?

What was I really looking for in a recipe? If I had to list all the things I want in a homemade brownie, what would it be? Chewy, slightly crispy and firm on the outside, moist, a good balance between chocolate and sweetness (maybe a bit on the sweet side), maybe even decadent to the point where if you have anything larger than a 1" x 1" square, you'll need a tall glass of milk to eat it. Okay, maybe not that decadent.

So what came to mind? I know, some of you are yelling at your monitor right now what you think came to mind. And if you said Betty Crocker, you just won yourself a year's supply of cocoa powder! Just kidding but I do have a pan of AB's brownies that I can send to you (oh wait, those are in the trash).

Can it be? After all that money spent on Callebaut cocoa powder and I'm longing for a pan of BC's brownies? It shouldn't really be a surprise since I grew up with Betty Crocker's Brownie mix, as so did The Mister. We love BC's brownies, chewy and chocolaty (not cocoa'ey, there's a huge difference) and even a little crispy on the sides, moist on the inside. And how do I recreate BC brownies from scratch? I mean is it worth it to make it from scratch when I can just buy BC supreme mix for $2/box? Well, I gotta find some way to use up all that cocoa powder, don't I?

A search of BC recipes didn't result in anything that sounded different than all those other cakey recipes. So thus started the experiment, I am going to come up with my own BC version. I looked up the ingredients and instructions for BC brownies: flour, sugar, egg, oil, dutch cocoa (woohoo!), water and a bunch of additives and other stuff. Okay, that's a start.

So with flour, sugars, dutch cocoa, eggs, oil, butter, I was ready. Coming up, the result and taste test of Brownie #1. (What? That's it? That's like all preparation and no H!) Trust me, stayed tuned. It'll be worth it. And if not, I'll send you a consolation block of AB Cocoa Brownies.


Read more!

Friday, March 13, 2009

Pim's Thai Fried Chicken

What can I say, I love fried foods. And the latest new recipe I tried was Chez Pim's Thai-Marinated Fried Chicken. Pim's secret is using rice flour. I tried rice flour once with the Korean Fried Chicken Wings to see what kind of crust it produced. Rather than mixing in the rice flour with the sauce, I marinated the wings in the sauce alone and then dredged in rice flour. The resulting crunch was nice but the color of the crust had a whitish/grey color. This is what happened with my Thai fried chicken, too.

If you look at Pim's pictures, hers are nice and golden brown.

And you see here mine, it's got some golden brown but didn't turn out as pretty as Pim's. The slight white/grey coloring, almost powderish looking crust was on all of the drumsticks. But it sure tasted good and the crunch was very nice! Maybe I coated mine a little too much with rice flour and should have been more of a dusting, now that I compare my picture to Pim's. In Pim's, you can see some of the chicken and meat, where mine is completely coated. The oil temperature may have been a little too low too since it was taking almost 15 minutes on the first side and another 8 minutes on the second side. I'll have to play around with the heat a bit more. (I figured out why this happened! See my postscript at the end of the post.)

But even if my drumsticks aren't as pretty, they sure were tasty! As a matter of fact, The Mister said he'd rather have these over the Korean Fried Chicken Wings! I don't know if I'd go so far to compare the two since they are 2 different birds (ahem, sorry for the bad pun). They both deserve their own spotlights I think. The Thai fried chicken is salty, savory, and you can just make out the garlic and cilantro taste. The Korean fried chicken is all about the spicy-sweet balance. Different tastes, different crusts. Both really good.

So if you like Asian-style fried chicken, this is one you're got to try!

Postscript: SO! I figured out why my drumsticks were getting the gray color after frying. Thinking about it now, I feel kind of silly that I overlooked such a simple thing. I was at 99 Ranch last week and decided to pick up a new package (different brand) of rice flour. As I was looking over the brands, it dawned on me that the rice flour I had at home which I used for these drumsticks were probably glutinous (mochi) rice flour. I decided to buy a Thai brand of rice flour and when I came home, compared the two and sure enough, that was it! That was my problem, wrong kind of rice flour. Sheesh.

I made a batch with the correct rice flour and it turned out golden brown just like Pim's and tasted even better than with the glutinous rice flour. It was so crunchy and it didn't really matter how much rice flour I had on the drumsticks. I have to agree with The Mister now that I think I like these over the Chicken Alice-style fried wings.


Read more!

Wednesday, March 11, 2009

Sourdough French Bread (Baguette)

Sundays are good days for me to bake bread since they are typically quiet, nonstressful, relaxed kind of day. On this particular Sunday, The Mister was working and I had the day all to myself, a good day to bake bread!

I've had my sourdough starter (from Breadtopia) for almost 5 months now, taking care of it every week or so. Although not neglected in feeding, I have only used it a couple of times in no-knead breads. Haven't been too successful with sourdough NKBs so I decide to try my hand at a sourdough French Baguette using the regular recipe but substituting with sourdough starter. Before I get to the bread, here's a picture of the glass jar that the starter lives in, kept in the back of the refrigerator. You know, in case anyone is curious.


Here's a shot of the inside, bubbly and alive! This was after feeding it 2 times in preparation for the bread.


Instructions are exactly the same as the regular French baguette recipe except the substitution for the starter so I will only list the ingredients and spare the redundancy in directions. Since the sourdough starter has water in it, I had to adjust the amount of water in the recipe. How much is kind of a guess. But it's okay since the amount of flour will increase or decrease to get the right dough consistency. For this one, I over adjusted a bit based on past breads. I didn't take out a 1:1 ratio (reduced liquids by 1/4 C) but a bit more (by 2 Tbsp). Doesn't seem like much but sourdough can be finicky for me.

I also added an extra amount of dry yeast because I wanted to help the dough develop, although according to Breadtopia and my bread book, this isn't necessary. But I thought I'd better since my starter has been somewhat dormant.

Ingredients:
1/4 cup sourdough starter
2 tsp active dry yeast
1/8 cup (~2 Tbsp) warm water (105-115 degrees F)
1 3/4 cups cool water (45-55 degrees F)
5 1/2 - 6 1/2 cups unbleached all-purpose flour
2 tsp salt
Cornmeal (if using baguette loaf pan)


The results were pretty darn good, by far better than the KNB results. The bread didn't have an extremely sour taste as the very first bread I made with the starter but that can be remedied if I feed the starter more the next time. But I liked the overall taste it had. What was interesting is that the bread tasted saltier than the regular so I think I'd cut that back to 1.5 tsp next time. The crust wasn't as crusty as the regular baguette but I had expected that. I noticed the same thing with Panera's regular and sourdough baguettes so I'm thinking it's a sourdough thing.

I think my next sourdough experiment might be a loaf using the basic white recipe. That might be interesting to see how the crust will turn out. It would be great to have sourdough bread without the long wait. But I'll have to see how the taste is without the longer proofing time.


Read more!

Sunday, March 8, 2009

Ina's Brownie Pudding

You know how sometimes a craving hits you when watching/reading something? Okay, so it happens to me more often than not. This time, it was Ina's 40th wedding anniversary dinner episode. I started to watch it for the Italian Wedding Soup but it was the Brownie Pudding that captured my attention. I love a good brownie, one that's crusty on the outside but still chewy on the inside. So the thought of a molten-style brownie sounded really good!


I looked through the pantry didn't have any good dutch-processed cocoa powder, just Hershey's plain ol' cocoa powder. It'll have to suffice (sorry Ina). I didn't have to look through the liquor cabinet to know that the closest thing I had to framboise liqueur was Framboise beer and that wasn't going to cut it. Although the recipe says it's optional, I decided to add in another liqueur, Cointreau, since it also has a sweet flavor, although not like framboise. I also didn't want to invest $29 in a bottle since I don't have any other recipes that calls for it. I guess I could always use it in mixed drinks. Let's see how the recipe is first.


The recipe came together very quickly. The longest part was waiting for it to cool down and debating whether to wait until The Mister got home before spooning into it. If you guessed that I couldn't wait, then you might know me too well. I had to try a little bit of it to see how the Hershey's and Cointreau tasted. The piece I took (in the first picture) was from the side so the inside was a little more set up than what I would expect from an almost "molten" center. But it looked more set up than actual. And it really did have a slight pudding mouth feel. I couldn't taste the Cointreau and the chocolate taste was decent, though I'm sure it would taste better with good dutch-processed cocoa powder. This will really go well with some vanilla ice cream!

Even before I finished this post, I place my order for some Callebaut Cocoa Powder, enough to last me a whole year athough I think I overdid it a bit (ya' think?). And next time I'm at BevMo, I'm going to pick up some Chambord liqueur (love it in mixed drinks) and maybe framboise liqueur see how each works in the recipe.

Hope you are enjoying your Sunday. And did you remember to turn your clocks forward today?


Read more!

Saturday, March 7, 2009

Meatball Sandwichs

Even though the chicken sandwich didn't turn out as good as I had hoped, I tried again but with a simpler approach, the KISS Principle. Things that I know taste good together should give me better results (fingers crossed).

Yup, sometimes the most enjoyable things are the simpler things. This meatball sandwich was really just things thrown together from leftovers. Simple but very delicious. The leftover meatballs and marinara sauce were from the spaghetti and meatball dinner. The baguette was from Panera Bread that I had bought for the chicken sandwich. I used prepackaged shredded mozzarella, something I usually have on hand for quick pizza dinners. Shaved Parmesan cheese would have been good, I think, but I was trying to keep to the Principle so opted to leave it out. Sling these together, toast in the oven, and a wonderful meal in just about 5 minutes. Add a side of marinara sauce for dipping and for good measures.

Don't forget tomorrow is Daylight Saving Time. Move your clocks ahead 1 hour before going to bed. Hope everyone is having a wonderful weekend.


Read more!

Friday, March 6, 2009

Monday on No Reservations - Vietnam (Preview)

For the past few years, I've been living vicariously through Kirk's (mmm-yoso) love of banh mi. On Monday, I'll be able to live through Tony Bourdain since he'll be in Vietnam. Just watch the video below and you'll see what I mean. According to Travel Channel, Tony will be wandering through fish markets, food stands and sidewalk cafes. If the show is anything like this preview, I know I'm going to be hungry afterwards.

You can watch the episode (which apparently is the last new episode until September) Monday, March 9 at 10pm EST on the Travel Channel.


Read more!

Wednesday, March 4, 2009

Wednesday Ramblings

Just a quickie today. A couple of weeks ago, I made French Chicken in a Pot, a meal that was a bit too much food for 2 people. I decided to use the leftover in chicken sandwiches for lunch the next day. Some fresh baguettes from Panera Bread that morning was just the thing I needed.

The Mister had a plain sandwich, chicken, lettuce, mayonnaise, and mustard. I wanted a little something more interesting and thought roasted red bell peppers would be nice. After rummaging through the pantry, thinking I had an unopen jar but didn't, I settled for something a little different using what was in the fridge. Skipping over the stacker pickles and guerre cheese, I opted for goat cheese and pickled beets with some lettuce. Here's the concoction.

Not the most delicious sandwich I've made but it was interesting. It probably could have used mustard but that might have overpowered the goat cheese. Maybe some Ranch dressing or even EVOO and balsamic vinegar would have been nice. Or maybe some sliced peppercinis to give it a punch, but then so would have roasted red bell peppers. Oh well. Nice thought, poor execution, and even poorer stock. But at least we used up the leftover chicken.

And now for something completely different...

It has been 5 months since I've worked on a quilt project. Talk about losing the bubble on something. The last quilt I made was this one for a friend's new baby girl (guess what the baby's name is??). The picture is just of the quilt top that sat there for 2 months waiting for me to get off my rump to finish (sheesh). Since finishing this, I have yet to start my next baby quilt for another friend who had a baby girl a few months back. So I'm posting this, hoping it will motivate me to start planning it and getting it done before that baby goes off to college. (Any bets out there?)

Go ahead, razz me. I need that proverbial kick in the ass. Sigh...is it Friday yet?


Read more!

Monday, March 2, 2009

Hungarian Goulash (Gulyás)

When I received the recent issue (#118) of Saveur last week, I quickly flipped through to find the article on the glazed Hawaiian-style baby back ribs (cover feature). But something stopped me before I could get there. It was the piece on Gulyás, also known as Hungarian Goulash. The Mister immediately came to mind since he loves these type of dishes. So I asked him if he's ever had Goulash.

The Mister: Oh, I love Goulash! My uncle used to take me to this place where they had the best Hungarian Goulash! I would always order it and then have the cheesecake for dessert. You know my grandfather was Hungarian.

Me: He was? I thought he was German?

The Mister: He was, but he was also Hungarian!

Ah, so that makes The Mister German, Croatian, Polish, maybe some Italian, and now, Hungarian. And possibly some other Slavic heritage thrown in here and there!

So after reading the article, The Mister threw a challenge at me to make an authentic Goulash. Huh, I wasn't even sure what authentic Goulash was before reading the article. I, apparently like so many mislead Americans, thought Goulash was just another style of beef stew. Even the mother-in-law was eager to hear about the results when she found out about the challenge.

As usual when trying a new recipe and not really sure how authentic Goulash should taste like, I followed the recipe exactly (you can find the recipe here). The recipe is pretty straightforward. The only thing I couldn't find from the ingredients list was the Italian frying pepper. Not sure what Italian frying peppers were, I did a quick search and found that they are similar to Cubanelle (Anaheim) peppers. Now I was set.

Right off the bat, I had to adjust the heat on my old stove when cooking the onions. The recipe calls for cooking the onions, covered, on medium heat. The heat was too high and started to brown the onions too much, so I adjusted it down one notch.

I tasted the broth after adding the 5 cups of water. It seemed quite bland to me so I added a bit more salt and fresh ground pepper. I also thought it needed it to help flavor the beef while it cooked. After 40 minutes of simmering with the lid on, I added the potatoes. This is what it looked like at the 40 minute mark. There's just a slight layer of oil on top but the broth was starting to get a brown coloring and the meat was starting to get tender. I tasted the broth again and I still felt it needed a bit more salt.

In looking at this, I can see why some people think Goulash is a tomato based soup. The Hungarian sweet paprika really does provide a wonderful rich color as the recipe states.

After another 25 minutes of simmering with the lid off and the potatoes were tender, I added the pepper and tomato. I tasted the broth and it was perfectly seasoned for me. I think that last salt add was just the touch it needed. Cooked it for the final 2 minutes and then plated it up with some fresh sourdough bread.

The Mister said it was awesome. Guess he really meant it because he didn't say a single word while eating 2 bowls of the Goulash. The meat turned out really tender, the parsnip added a wonderful flavor (it might be my new favorite vegetable), and the depth of flavor from the soup was outstanding. Now I love Hungarian paprika but I never knew it could be so good as the primary seasoning.

This was the best beef soup I've ever had. And in all honesty, I wasn't convinced in the beginning that I was really going to like it because I never really got into beef soup or stew (I know, Goulash isn't stew). As a matter of fact, I had 2 bowls of it too.

So there you have it. A winner from Saveur and many thanks to Carolyn Bánfalvi for sharing her mother-in-law's wonderful Gulyás recipe.


Read more!

Saturday, February 28, 2009

Sweet Home Chicago Pizza (Deep Dish)

We've had the flyer for Sweet Home Chicago Pizza laying around on the counter for several weeks now and finally got around to trying their pizza. The Mister, being from New York, have always preferred NY-style pizza but wanted to try a Chicago-style pizza. His last one was over 7 years ago and he couldn't remember if he liked it or not. So on an evening when neither one of us wanted to cook, we ordered delivery.

Sweet Home Chicago Pizza also offers New York-style pizza, which may seem a bit odd for a "Chicago" pizza place. But the story I heard is that the owners of Sweet Home Chicago Pizza purchased the recipe from the previous pizza joint owner (Coney Island Pizza). Guess the new owner wanted to be able to offer the same type of pizza to loyal Coney Island customers. I thought that was pretty nice. So we can get both type of pizza if we wanted to, whatever we were in the mood for. Sweet!

We ordered a 9" (medium) Michael Jordan (sausage and pepperoni) deep dish and added mushrooms and onions ($2.50 for each additional topping for deep dish). If this was a thin-crusted pizza, a 9" pizza would have been too small. So we were a bit apprehensive about the size and whether it would be enough. So as a safety, we also ordered a side of hot wings.

About 45 minutes later, our dinner arrived. And this is what was in the pizza box. Sniff, sniff, smelled delicious!

Here's a cross section of the deep dish. It looks a little saggy because I took the picture after I scarfed down my dinner. I couldn't wait. As you can see, there 2 layers of gooey cheesy goodness, like a pie within a pie.

The sauce was a little bit on the sweet side, like Papa John's a bit. But it had really good flavor and tasted fresh. The crust was not bad but I prefer the crust on a NY-style pizza. Overall, this was a pretty good pizza. Oh yeah, I sliced the dish into quarters and we were only able to eat 1 quarter each. We were shocked! that neither one of us could eat another slice. The size was deceptive for sure.

The wings, although not advertised as Buffalo Wings, were very similar in style. The wings didn't have what it takes to be outstanding. It was okay because the wings were juicy and the sauce was very good. But the skin was limp, and I much prefer a crispier skin. It was served with Ranch, which I like but The Mister dislikes (he's a blue cheese kind of guy all the way).


In all honesty, if we couldn't get delivery, I'm not sure how often or willing we would be to drive here to get deep dish. But since I'm lucky they are so close, we'll be enjoying more of their pizza. I think next time I'll order a small deep dish (which I'm not convinced we will be able to finish in one sitting) and a NY-style pizza as comparison.

Sweet Home Chicago Pizza
14034 Poway Road,
Poway, CA 92064
858-668-3215

Hours:
Mon-Thu. 11:00 a.m. - 9:00 p.m.
Fri-Sat. 11:00 a.m. - 10:00 p.m.
Sun. 11:00 a.m. - 9:00 p.m.


Read more!